UbuntuにGitHubからDjangoプロジェクトをクローンする方法
UbuntuにGitHubからDjangoプロジェクトをクローンする方法をご紹介します。
条件
- Ubuntu 16.04 LTSを使用。
Djangoプロジェクトのクローン
以下のコマンドでDjangoプロジェクトをGitHubからクローンします。
$ git clone https://github.com/xxxxx/mysite.git
こんな感じでクローン処理が行われます。
$ git clone https://github.com/xxxxx/mysite.git
Cloning into 'mysite'...
remote: Enumerating objects: 6215, done.
remote: Counting objects: 100% (6215/6215), done.
remote: Compressing objects: 100% (3345/3345), done.
remote: Total 6215 (delta 1858), reused 6215 (delta 1858), pack-reused 0
Receiving objects: 100% (6215/6215), 13.28 MiB | 10.37 MiB/s, done.
Resolving deltas: 100% (1858/1858), done.
Checking connectivity... done.
Pythonのバージョン確認
以下のコマンドでPythonのバージョンを確認します。
$ python3 --version
Python 3.5.2
Djangoのインストール確認
Djangoがインストールされているかを確認します。
$ python3
>>> import django
Traceback (most recent call last):
  File "<stdin>", line 1, in <module>
ImportError: No module named 'django'
>>>
Djangoが存在しないようなのでインストールします。
$ sudo pip3 install django

Collecting django
  Downloading https://files.pythonhosted.org/packages/32/ab/22530cc1b2114e6067eece94a333d6c749fa1c56a009f0721e51c181ea53/Django-2.1.2-py3-none-any.whl (7.3MB)
    100% |????????????????????????????????| 7.3MB 1.1MB/s
Collecting pytz (from django)
  Downloading https://files.pythonhosted.org/packages/30/4e/27c34b62430286c6d59177a0842ed90dc789ce5d1ed740887653b898779a/pytz-2018.5-py2.py3-none-any.whl (510kB)
    100% |????????????????????????????????| 512kB 29.8MB/s
Installing collected packages: pytz, django
Successfully installed django-2.1.2 pytz-2018.5
インストールしたDjangoのバージョンを確認します。
$ python3
>>> import django
>>> print(django.get_version())
2.1.2
サーバーの起動
Djangoプロジェクトのディレクトリに移動してサーバーを起動します。
(manage.py のあるディレクトリに移動します)
$ cd mysite/
$ ls
MyDatabase  manage.py  mysite  polls  templates  venv
サーバーを起動します。
$ python3 manage.py runserver


Performing system checks...

System check identified no issues (0 silenced).
October 02, 2018 - 07:41:57
Django version 2.1.2, using settings 'mysite.settings'
Starting development server at http://127.0.0.1:8000/
Quit the server with CONTROL-C.
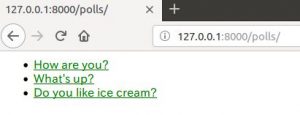
ブラウザからアクセスして想定通りの画面が表示されれば成功です。
とりあえずこれで動作はしますが、nginxなどのWebサーバーで動作させるためには別途設定が必要になります。


