WindowsにおいてVisual Studio Codeを用いてDjango開発を行う方法(デバッグ編)
WindowsにおいてVisual Studio Codeを用いてDjango開発を行う際のデバッグ方法をご紹介します。
目次
条件
- Windows 11
- Visual Studio Code Version 1.83.0
- Python 3.12.0
事前準備
プロジェクトの作成
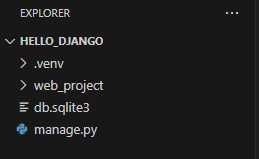
Visual Studio Codeで、任意のプロジェクトフォルダを開きます。
ここでは設定編で作成した「hello_django」を開きます。
仮想環境への切り替え
Visual Studio CodeでTerminalを開きます。
以下のコマンドを実行し仮想環境への切り替えを行います。
.venv\scripts\activate
仮想環境が有効になると、Terminalの表示が以下のようになります。
(コマンド入力欄に(.venv)が表示されるようになります。)
(.venv) PS C:\Users\infom\hello_django>
Djangoアプリの作成
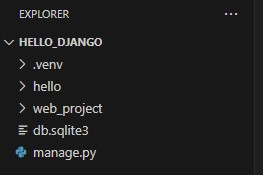
Visual Studio CodeのTerminalで以下のコマンドを実行します。
python manage.py startapp hello
以下のように、コマンド実行前後で「hello」というフォルダが追加されます。
(左:コマンド実行前、右:コマンド実行後)
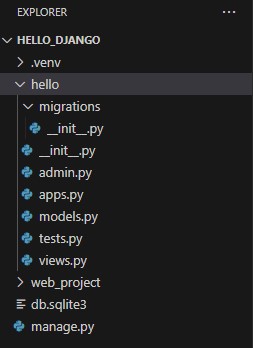
作成されたhelloフォルダを展開すると、いくつかのPythonファイルが作成されていることがわかります。
ソースの追加、修正
hello/views.py
既存のviews.pyを以下のように修正します。
from django.http import HttpResponse

def home(request):
    return HttpResponse("Hello, Django!")
hello/urls.py
helloフォルダの下に「urls.py」を作成し、以下のように記述します。
from django.urls import path
from hello import views

urlpatterns = [
    path("", views.home, name="home"),
]
web_project/urls.py
web_projectフォルダの下にある「urls.py」を以下のように記述します。
from django.contrib import admin
from django.urls import include, path

urlpatterns = [
    path("", include("hello.urls")),
    path('admin/', admin.site.urls)
]
- web_projectフォルダの下にある「urls.py」が実際のURLルーティングに使用されます。
- django.urls.includeを用いて「hello/urls.py」を取り込むことでアプリ内のルーティングを保持することができます。
アプリの実行
すべての変更ファイルを保存後、以下のコマンドを実行します。
python manage.py runserver
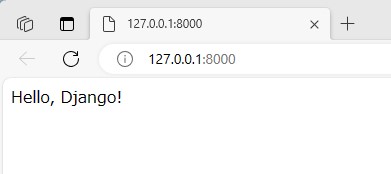
実行後、以下のURLを開きます。
http://127.0.0.1:8000/
以下のように、「Hello, Django!」という文字が表示されます。
デバッガ起動プロファイルの作成
Visual Studio Codeの左側にある「Run and Debug」というアイコンを選択します。
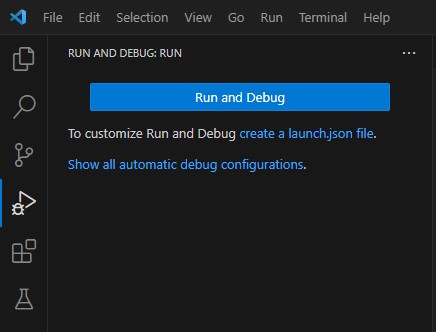
「create a launch.json file」というリンクを選択します。
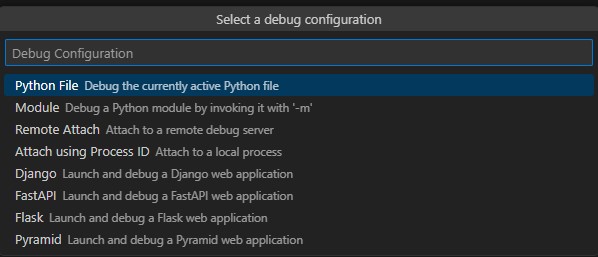
「Select a debug configuration」というプルダウンが開くので、「Django」を選択します。
すると以下ようなlaunch.jasonが作成され表示されます。
ここにはデバッグの各種設定が記述されています。
{
    // Use IntelliSense to learn about possible attributes.
    // Hover to view descriptions of existing attributes.
    // For more information, visit: https://go.microsoft.com/fwlink/?linkid=830387
    "version": "0.2.0",
    "configurations": [
        {
            "name": "Python: Django",
            "type": "python",
            "request": "launch",
            "program": "${workspaceFolder}\\manage.py",
            "args": [
                "runserver"
            ],
            "django": true,
            "justMyCode": true
        }
    ]
}
デバッガの起動
Visual Studio Codeの左上に表示されている、緑色の▷ Python: Djangoをクリックします。
すると、Djangoが起動します。

Terminalに表示された以下のURLをCtrl + クリックすることでブラウザでアプリが表示されます。
http://127.0.0.1:8000/
デバッガの停止
Visual Studio Codeの上のほうに表示されている赤い四角を押すことで停止することが出来ます。
![]()
デバッガの使用方法
ソースを以下のように変更します。
hello/urls.py
from django.urls import path
from hello import views

urlpatterns = [
    path("", views.home, name="home"),
    path("hello/<name>", views.hello_there, name="hello_there"),
]
hello/views.py
import re
from django.utils.timezone import datetime
from django.http import HttpResponse

def home(request):
    return HttpResponse("Hello, Django!")

def hello_there(request, name):
    now = datetime.now()
    formatted_now = now.strftime("%A, %d %B, %Y at %X")

    # Filter the name argument to letters only using regular expressions. URL arguments
    # can contain arbitrary text, so we restrict to safe characters only.
    match_object = re.match("[a-zA-Z]+", name)

    if match_object:
        clean_name = match_object.group(0)
    else:
        clean_name = "Friend"

    content = "Hello there, " + clean_name + "! It's " + formatted_now
    return HttpResponse(content)
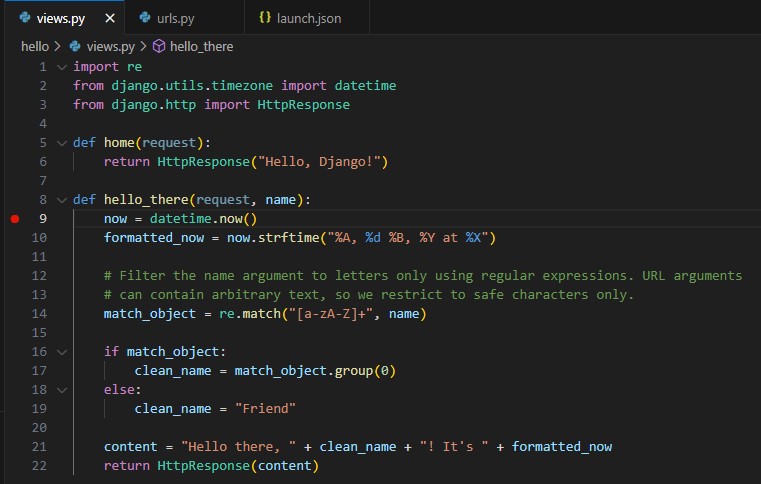
ブレークポイントの設定
デバッガで停止するブレークポイントを設定します。
ソース行数の左側をクリックすることでブレークポイントを設定することができます。
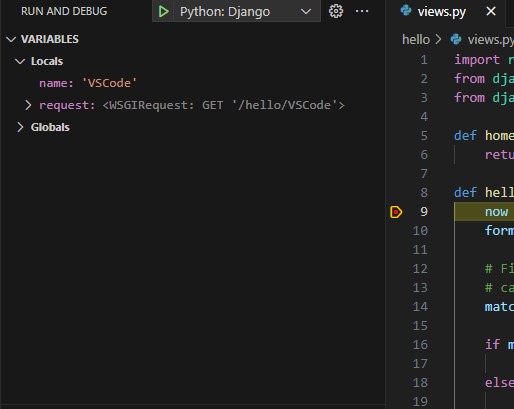
今回は、views.pyの9行目にブレークポイントを設定しました。
デバッガ実行
緑の▷ボタンを押してデバッガを起動します。
ステップ実行など
デバッガ起動状態で、ブラウザで以下のURLを開きます。
http://127.0.0.1:8000/hello/VSCode
すると、先ほど設定したブレークポイントで動作が一時停止します。
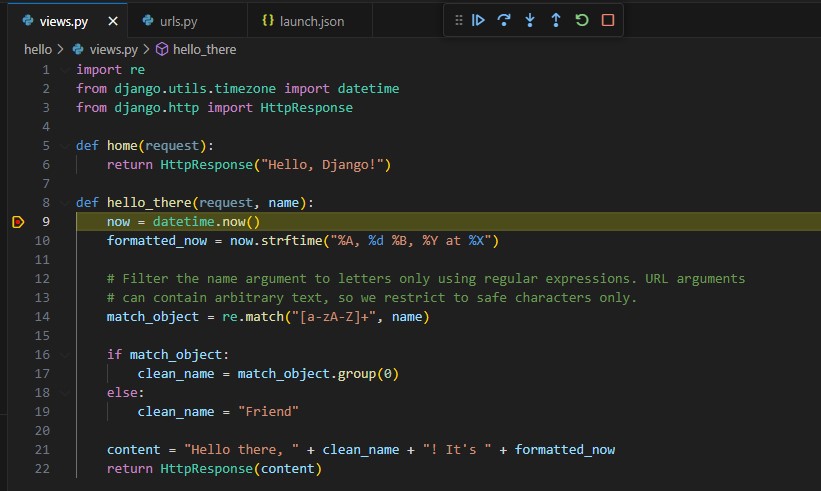
この状態で、左側のVARIABLESにおいて各変数にどのような値が入っているか確認することができます。
また、カーソルをソースの任意の変数に合わせることで、その中身を確認することもできます。
デバッガで使用する主な機能は以下の4つです。
(Visual Studio Codeの上のほうに表示されている青い記号4つ)
![]()
- Continue(F5)
次のブレークポイントまで処理を進める。(次のブレークポイントで止まる)
次のブレークポイントがない場合、以降の処理をすべて実行する。 - Step Over(F10)
現在表示しているソースの関数内で処理を1行ずつ進める。 - Step Into(F11)
現在表示しているソースで呼び出している関数内に入っていく。 - Step Out(Shift+F11)
現在の関数の呼び出し元まで処理を進める。
以上で、Visual Studio Codeを用いた一通りのデバッグが出来ることを確認することが出来ました。
参考
Django Tutorial in Visual Studio Code
https://code.visualstudio.com/docs/python/tutorial-django