Google ColaboratoryでGoogleドライブのファイルを読み書きする方法
Google ColaboratoryでGoogleドライブのファイルを読み書きする方法をご紹介します。
以下の記事の続きです。
ブラウザで機械学習を実行できるGoogle Colaboratory
目次
条件
- PCがインターネットに接続中
- ブラウザがChrome、Firefox、Safariのいずれか
Googleドライブのマウント
マウントのコマンド実行
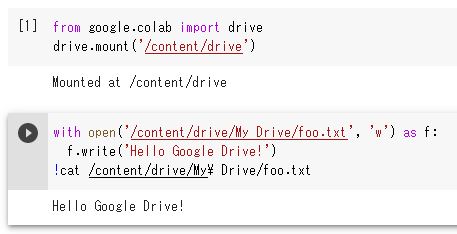
以下のコマンドを、colabのコードセルに入力して実行します。
from google.colab import drive
drive.mount('/content/drive')
または
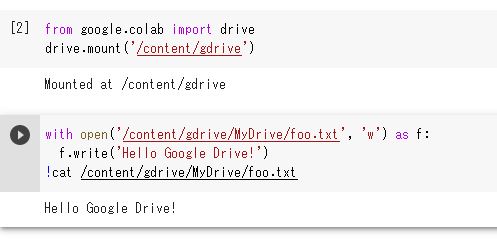
from google.colab import drive
drive.mount('/content/gdrive')
![]()
追記
「/content/drive」または「/content/gdrive」のどちらでもマウントできるようです。
マウントの文字列(drive or gdrive)に応じて、パスも変わるので気を付けてください。
(ちなみに、My Driveのスペースは無くても良いみたいです。⇒MyDriveでOK)
コードの取得
マウントのコマンドを実行した際に出力されたURLにアクセスします。
以下のような「Google Drive File Stream」のアクセス許可確認画面が表示されるので、許可を選択します。
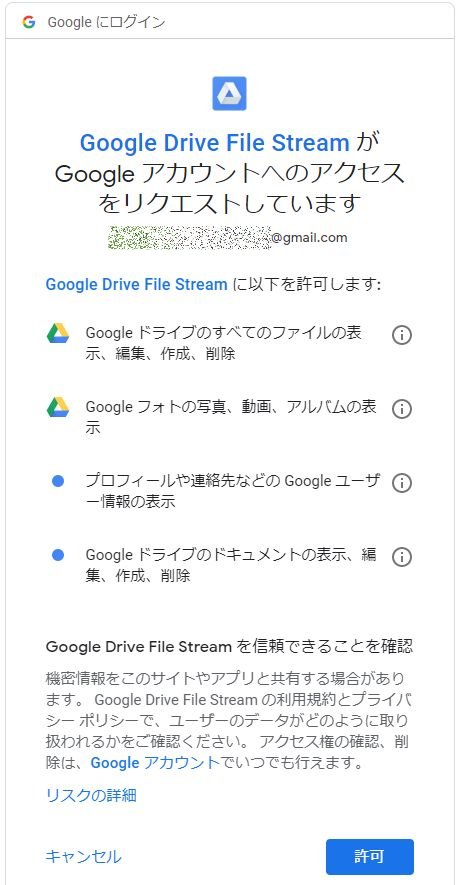
コードが表示されるので、コードの右側アイコンをクリックしてコピーします。

コード認証実行
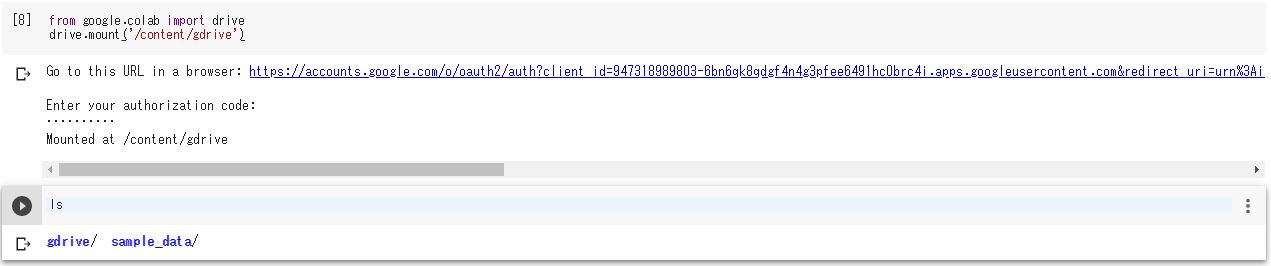
colabのコードセルに戻り、「Enter your authorization code:」にコピーしたコードを貼り付けて、Enterを押します。
![]()
認証が通ると以下のような表示となり、マウントが完了します。
![]()
新しいコードセルで「ls」を実行すると、gdriveというディレクトリが増えていることが確認出来ます。
(cdやlsは「!」を付けなくても実行できるようです。)
実際のディレクトリ
以下のディレクトリがGoogleドライブと対応しているようです。
‘/content/gdrive/My Drive’
Googleドライブへのファイル出力
事前準備
‘My Drive’の下にmodelsというディレクトリを作成します。
以下のような階層です。
‘/content/gdrive/My Drive/models’
モデル出力
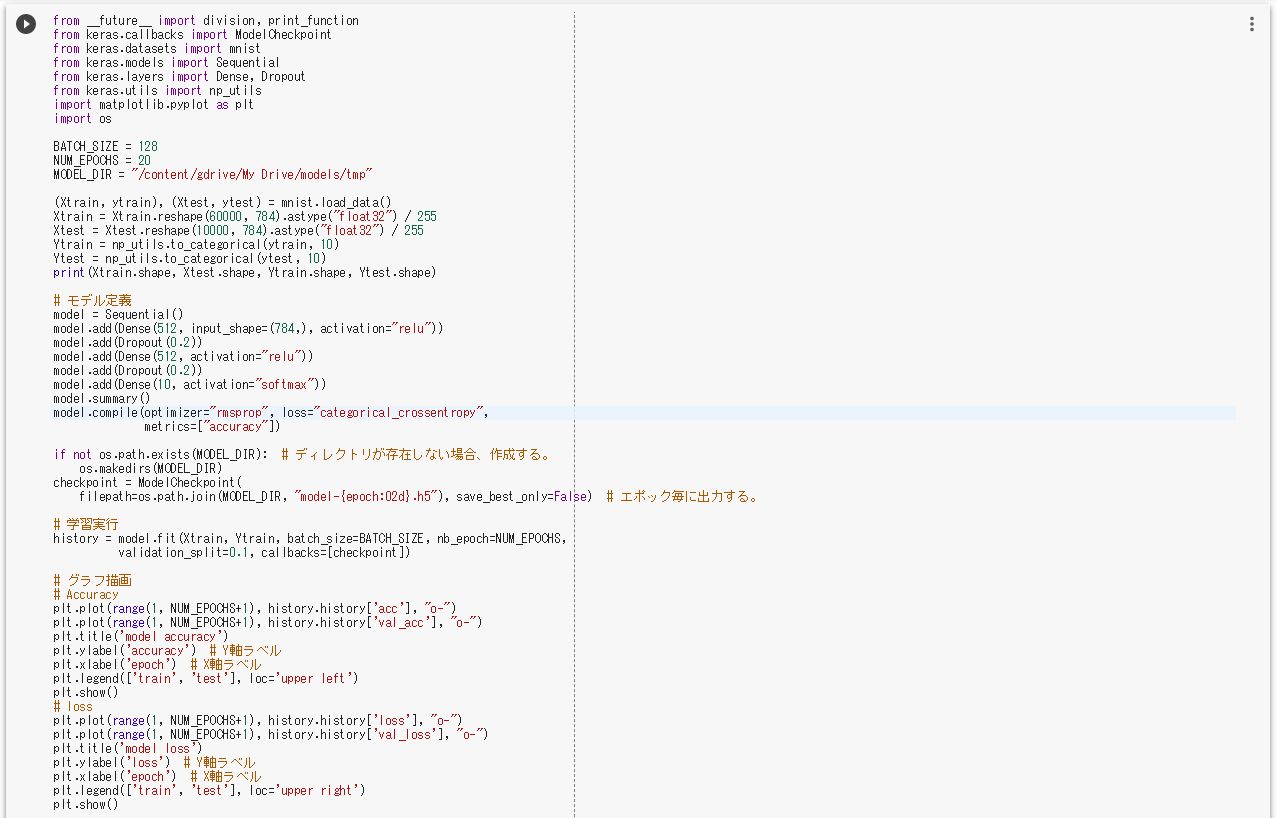
「各エポック毎にモデルを出力する」以下のプログラムを実行します。
(/content/gdrive/My Drive/models/tmp に出力します。)
from __future__ import division, print_function
from keras.callbacks import ModelCheckpoint
from keras.datasets import mnist
from keras.models import Sequential
from keras.layers import Dense, Dropout
from keras.utils import np_utils
import matplotlib.pyplot as plt
import os

BATCH_SIZE = 128
NUM_EPOCHS = 20
MODEL_DIR = "/content/gdrive/My Drive/models/tmp"

(Xtrain, ytrain), (Xtest, ytest) = mnist.load_data()
Xtrain = Xtrain.reshape(60000, 784).astype("float32") / 255
Xtest = Xtest.reshape(10000, 784).astype("float32") / 255
Ytrain = np_utils.to_categorical(ytrain, 10)
Ytest = np_utils.to_categorical(ytest, 10)
print(Xtrain.shape, Xtest.shape, Ytrain.shape, Ytest.shape)

# モデル定義
model = Sequential()
model.add(Dense(512, input_shape=(784,), activation="relu"))
model.add(Dropout(0.2))
model.add(Dense(512, activation="relu"))
model.add(Dropout(0.2))
model.add(Dense(10, activation="softmax"))
model.summary()
model.compile(optimizer="rmsprop", loss="categorical_crossentropy",
              metrics=["accuracy"])

if not os.path.exists(MODEL_DIR):  # ディレクトリが存在しない場合、作成する。
    os.makedirs(MODEL_DIR)
checkpoint = ModelCheckpoint(
    filepath=os.path.join(MODEL_DIR, "model-{epoch:02d}.h5"), save_best_only=False)  # エポック毎に出力する。

# 学習実行
history = model.fit(Xtrain, Ytrain, batch_size=BATCH_SIZE, nb_epoch=NUM_EPOCHS,
          validation_split=0.1, callbacks=[checkpoint])

# グラフ描画
# Accuracy
plt.plot(range(1, NUM_EPOCHS+1), history.history['acc'], "o-")
plt.plot(range(1, NUM_EPOCHS+1), history.history['val_acc'], "o-")
plt.title('model accuracy')
plt.ylabel('accuracy')  # Y軸ラベル
plt.xlabel('epoch')  # X軸ラベル
plt.legend(['train', 'test'], loc='upper left')
plt.show()
# loss
plt.plot(range(1, NUM_EPOCHS+1), history.history['loss'], "o-")
plt.plot(range(1, NUM_EPOCHS+1), history.history['val_loss'], "o-")
plt.title('model loss')
plt.ylabel('loss')  # Y軸ラベル
plt.xlabel('epoch')  # X軸ラベル
plt.legend(['train', 'test'], loc='upper right')
plt.show()
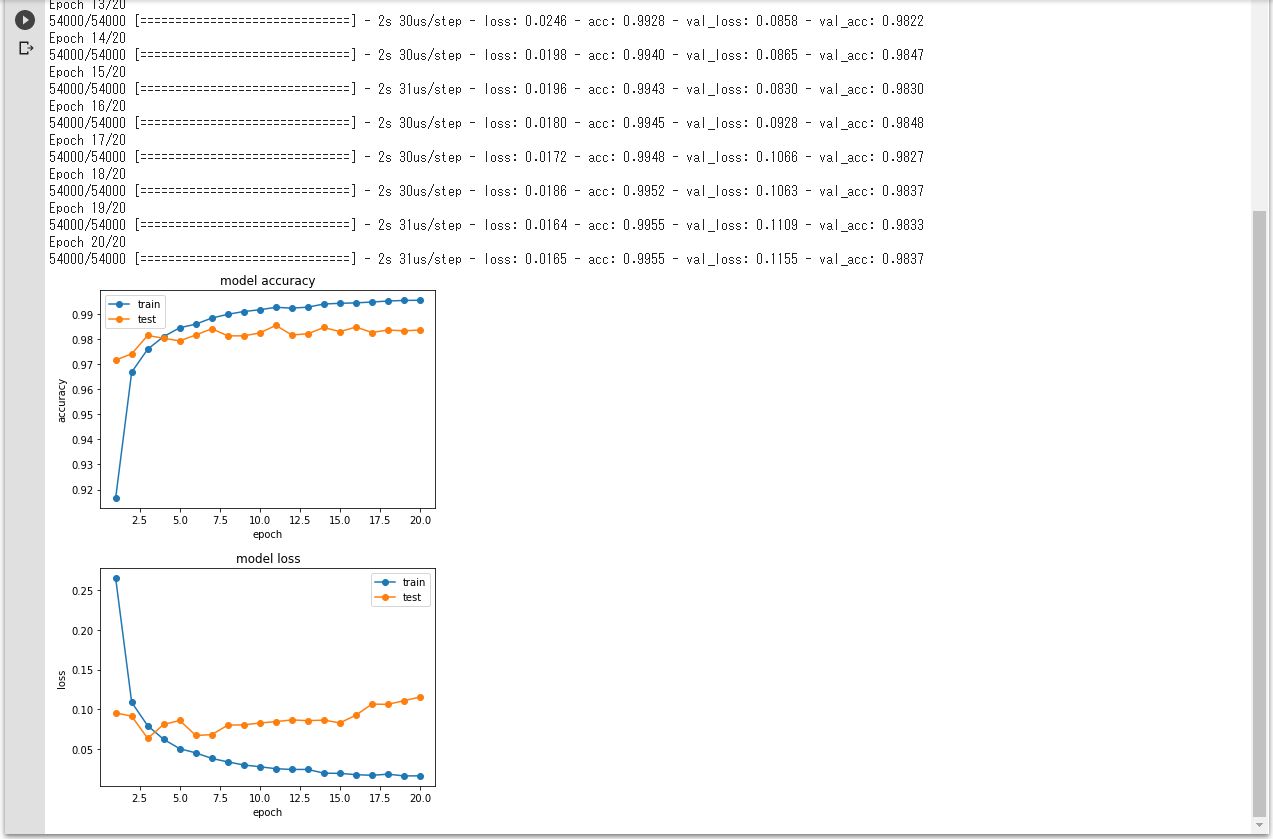
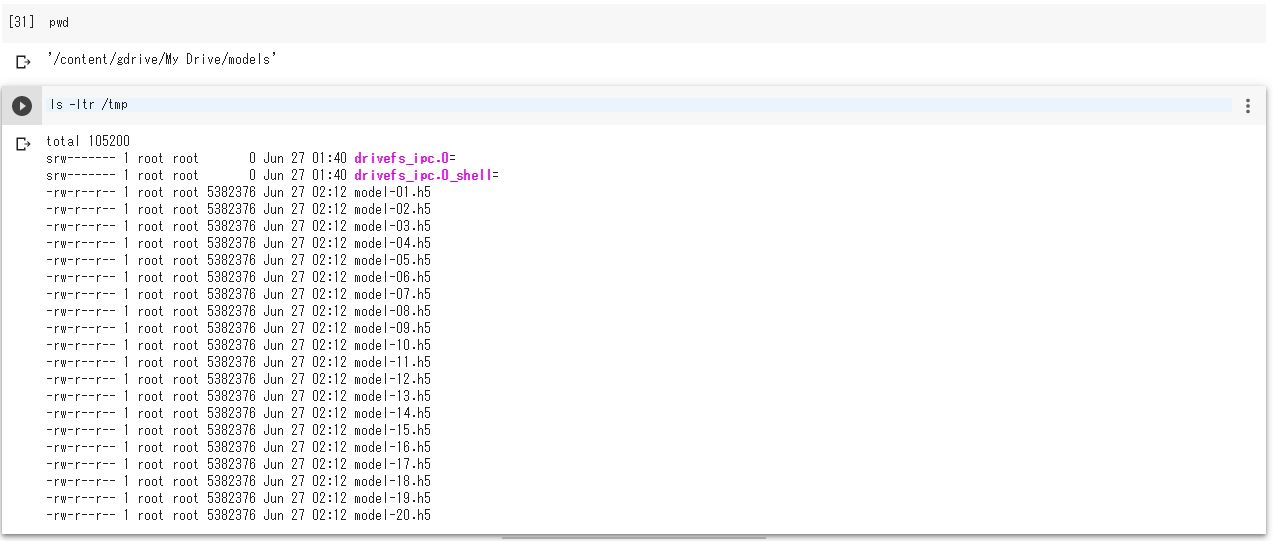
実行結果
/content/gdrive/My Drive/models/tmp にモデル情報のファイルが出力されています。
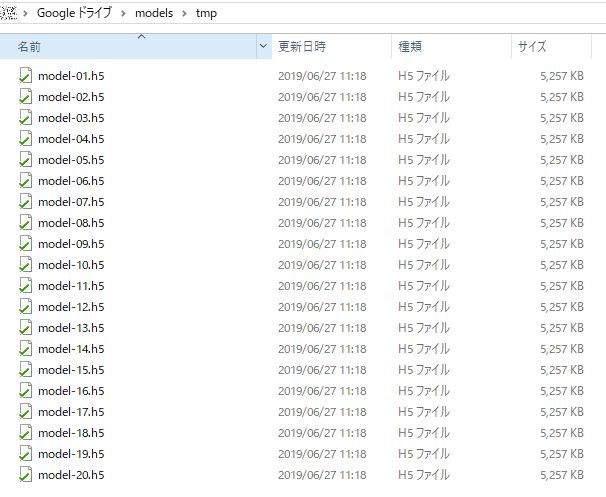
ローカルPCで、Googleドライブの当該ディレクトリを確認すると、同様にモデル情報のファイルが出力されていることが分かります。
参考
colab:External data: Drive, Sheets, and Cloud Storage
https://colab.research.google.com/notebooks/io.ipynb
Qiita:Google ColaboratoryをGoogle DriveにマウントしてPythonを実行する。
https://qiita.com/asakuraTsukazaki/items/e7eb1f0c43be1e0231c6
from google.colab import drive
drive.mount(‘/content/gdrive’)
間違っています。
ご指摘ありがとうございます。
「drive」と「gdrive」のどちらでもマウント出来ることを確認いたしました。
公式では「drive」となっています。
当該記事に追記しております。