Kerasで学習後の重みを用いて入力サンプルに対する予測出力を行う方法
Kerasで学習後の重みを用いて入力サンプルに対する予測出力を行う方法をご紹介します。
目次
- 1 条件
- 2 学習
- 3 予測の出力
- 4 参考
- 4.1 Keras Documentation:The Sequential model API
- 4.2 Keras Documentation:ModelクラスAPI
- 4.3 GitHub Gist:classifier_from_little_data_script_1.py
- 4.4 Qiita:[Keras/TensorFlow] KerasでMINSTの学習と予測
- 4.5 How to Make Predictions with Long Short-Term Memory Models in Keras
- 4.6 stackoverflow:keras: what is the difference between model.predict and model.predict_proba
条件
- Python 3.7.0
- Keras 2.1.2
学習
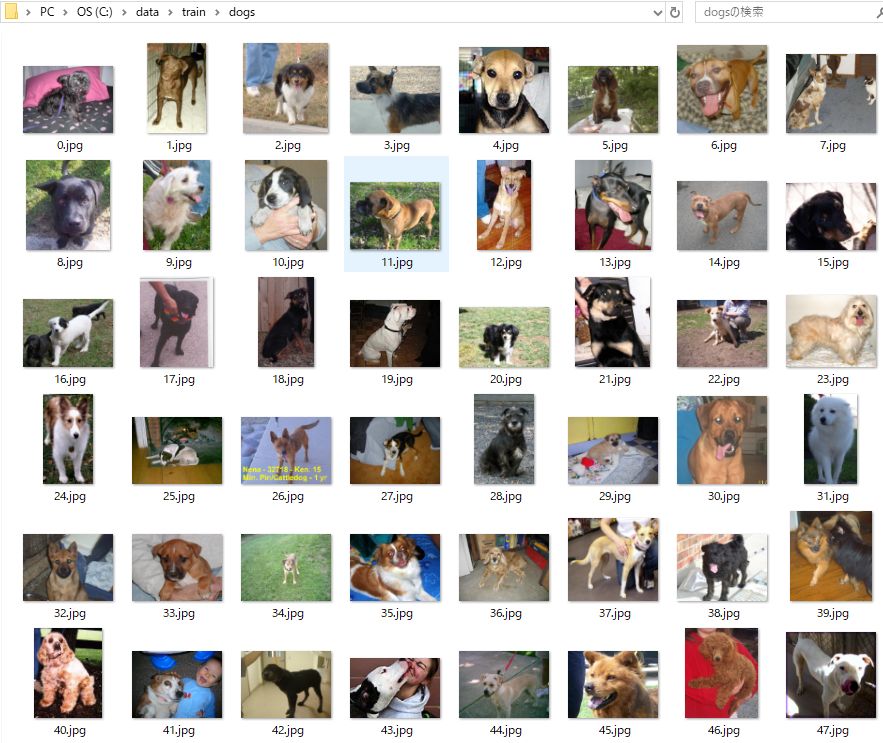
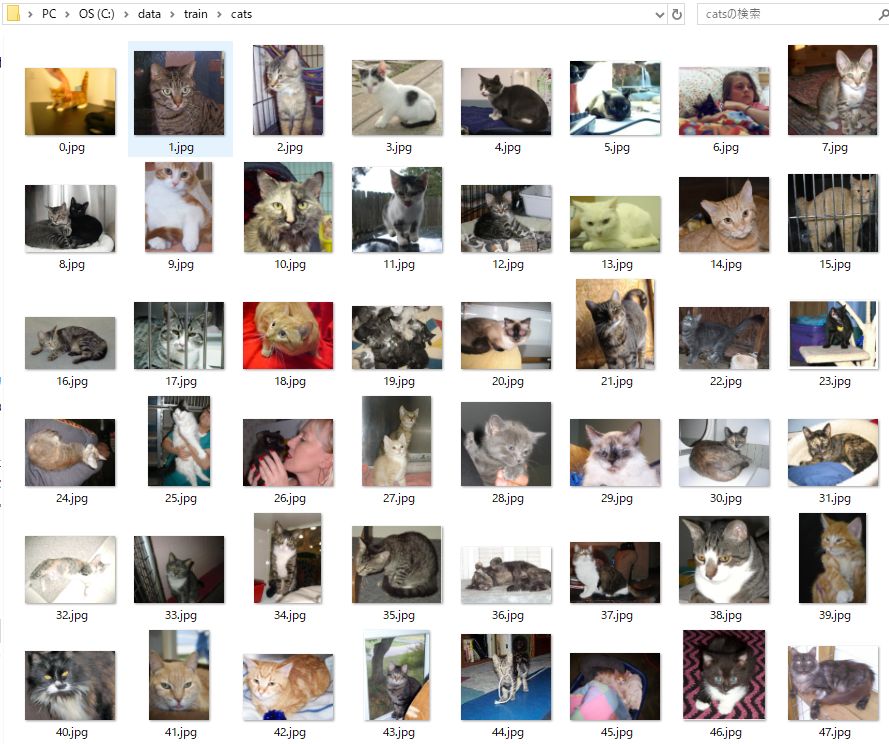
学習画像
以下のように、犬と猫の画像を配置します。
data/
    train/
        dogs/
            dog001.jpg
            dog002.jpg
            ...
        cats/
            cat001.jpg
            cat002.jpg
            ...
    validation/
        dogs/
            dog001.jpg
            dog002.jpg
            ...
        cats/
            cat001.jpg
            cat002.jpg
            ...
ソース
以下のソースを用いて学習を行い、重みを保存します。
ラベルは、Catが0、Dogが1になります。
- flow_from_directory()の引数で、classes=を指定していないため、クラスサブディレクトリのリストの順番はalphanumeric(英数字順)になります。
from keras.preprocessing.image import ImageDataGenerator
from keras.models import Sequential
from keras.layers import Conv2D, MaxPooling2D
from keras.layers import Activation, Dropout, Flatten, Dense
from keras import backend as K


# dimensions of our images.
img_width, img_height = 150, 150

train_data_dir = 'C:/data/train'
validation_data_dir = 'C:/data/validation'
nb_train_samples = 2000
nb_validation_samples = 800
epochs = 50
batch_size = 16

if K.image_data_format() == 'channels_first':
    input_shape = (3, img_width, img_height)
else:
    input_shape = (img_width, img_height, 3)

model = Sequential()
model.add(Conv2D(32, (3, 3), input_shape=input_shape))
model.add(Activation('relu'))
model.add(MaxPooling2D(pool_size=(2, 2)))

model.add(Conv2D(32, (3, 3)))
model.add(Activation('relu'))
model.add(MaxPooling2D(pool_size=(2, 2)))

model.add(Conv2D(64, (3, 3)))
model.add(Activation('relu'))
model.add(MaxPooling2D(pool_size=(2, 2)))

model.add(Flatten())
model.add(Dense(64))
model.add(Activation('relu'))
model.add(Dropout(0.5))
model.add(Dense(1))
model.add(Activation('sigmoid'))

model.compile(loss='binary_crossentropy',
              optimizer='rmsprop',
              metrics=['accuracy'])

# this is the augmentation configuration we will use for training
train_datagen = ImageDataGenerator(
    rescale=1. / 255,
    shear_range=0.2,
    zoom_range=0.2,
    horizontal_flip=True)

# this is the augmentation configuration we will use for testing:
# only rescaling
test_datagen = ImageDataGenerator(rescale=1. / 255)

train_generator = train_datagen.flow_from_directory(
    train_data_dir,
    target_size=(img_width, img_height),
    batch_size=batch_size,
    class_mode='binary')

validation_generator = test_datagen.flow_from_directory(
    validation_data_dir,
    target_size=(img_width, img_height),
    batch_size=batch_size,
    class_mode='binary')

model.fit_generator(
    train_generator,
    steps_per_epoch=nb_train_samples // batch_size,
    epochs=epochs,
    validation_data=validation_generator,
    validation_steps=nb_validation_samples // batch_size)

model.save_weights('model.h5')
予測の出力
学習後のモデルを読み込み、未学習イメージを入力します。
以下、3つの値を出力します。
- model.predict()
- model.predict_classes()
- model.predict_proba()
ソース
KerasではPILを用いて画像の読み込みを行っているようなので、PILで画像を読み込みます。
from keras.models import load_model
from PIL import Image
import os
import numpy as np


img_width, img_height = 150, 150
DATADIR = "C:/data/validation/dogs"

model = load_model('model.h5')


img_predict = []
for image_name in os.listdir(DATADIR):
    try:
        img = Image.open(os.path.join(DATADIR, image_name))  # 画像読み込み
        img = img.convert("RGB")
        img = img.resize((img_width, img_height))  # 画像のリサイズ
        img_array = np.asarray(img)
        img_predict.append(img_array)
    except Exception as e:
        pass

img_predict = np.asarray(img_predict)
print('img_predict.shape = ', img_predict.shape)


result_predict = model.predict(img_predict)
result_predict_classes = model.predict_classes(img_predict)
result_predict_proba = model.predict_proba(img_predict)

for i in range(len(img_predict)):
  print("predict=%s, proba=%s, class=%s, " % (result_predict[i], result_predict_proba[i], result_predict_classes[i]))
参考:Kerasのイメージ読み込み
PILを用いてイメージの読み込みを行っているようです。
# image.py抜粋

def load_img(path, grayscale=False, target_size=None,
             interpolation='nearest'):
    """Loads an image into PIL format.

    # Arguments
        path: Path to image file
        grayscale: Boolean, whether to load the image as grayscale.
        target_size: Either `None` (default to original size)
            or tuple of ints `(img_height, img_width)`.
        interpolation: Interpolation method used to resample the image if the
            target size is different from that of the loaded image.
            Supported methods are "nearest", "bilinear", and "bicubic".
            If PIL version 1.1.3 or newer is installed, "lanczos" is also
            supported. If PIL version 3.4.0 or newer is installed, "box" and
            "hamming" are also supported. By default, "nearest" is used.

    # Returns
        A PIL Image instance.

    # Raises
        ImportError: if PIL is not available.
        ValueError: if interpolation method is not supported.
    """
    if pil_image is None:
        raise ImportError('Could not import PIL.Image. '
                          'The use of `array_to_img` requires PIL.')
    img = pil_image.open(path)
    if grayscale:
        if img.mode != 'L':
            img = img.convert('L')
    else:
        if img.mode != 'RGB':
            img = img.convert('RGB')
    if target_size is not None:
        width_height_tuple = (target_size[1], target_size[0])
        if img.size != width_height_tuple:
            if interpolation not in _PIL_INTERPOLATION_METHODS:
                raise ValueError(
                    'Invalid interpolation method {} specified. Supported '
                    'methods are {}'.format(
                        interpolation,
                        ", ".join(_PIL_INTERPOLATION_METHODS.keys())))
            resample = _PIL_INTERPOLATION_METHODS[interpolation]
            img = img.resize(width_height_tuple, resample)
    return img
実行結果
以下は実行結果の抜粋です。
img_predict.shape =  (401, 150, 150, 3)

・・・

predict=[1.], proba=[1.], class=[1],
predict=[1.], proba=[1.], class=[1],
predict=[1.], proba=[1.], class=[1],
predict=[1.], proba=[1.], class=[1],
predict=[0.01060236], proba=[0.01060236], class=[0],
predict=[1.], proba=[1.], class=[1],
predict=[1.], proba=[1.], class=[1],
predict=[1.], proba=[1.], class=[1],
predict=[1.], proba=[1.], class=[1],

・・・

predict=[1.], proba=[1.], class=[1],
predict=[1.], proba=[1.], class=[1],
predict=[1.], proba=[1.], class=[1],
predict=[1.], proba=[1.], class=[1],
predict=[0.], proba=[0.], class=[0],
predict=[0.999994], proba=[0.999994], class=[1],
predict=[1.], proba=[1.], class=[1],
predict=[1.], proba=[1.], class=[1],
predict=[1.], proba=[1.], class=[1],
predict=[1.], proba=[1.], class=[1],
ソース:OpenCVを用いた場合
参考として、OpenCVを用いたソースを以下に示します。
from keras.models import load_model
import cv2
import os
import numpy as np


img_width, img_height = 150, 150
DATADIR = "C:/data/validation/dogs"

model = load_model('model.h5')

img_predict = []

for image_name in os.listdir(DATADIR):
    try:
        img = cv2.imread(os.path.join(DATADIR, image_name), )  # 画像読み込み
        img = cv2.resize(img, (img_width, img_height))  # 画像のリサイズ
        img = cv2.cvtColor(img, cv2.COLOR_BGR2RGB)  # BGRからRGBへ変換
        img_predict.append(img)
    except Exception as e:
        pass

img_predict = np.asarray(img_predict)
print(img_predict.shape)


result_predict = model.predict(img_predict)
result_predict_classes = model.predict_classes(img_predict)
result_predict_proba = model.predict_proba(img_predict)

for i in range(len(img_predict)):
  print("predict=%s, proba=%s, class=%s, " % (result_predict[i], result_predict_proba[i], result_predict_classes[i]))
実行結果:OpenCVを用いた場合
以下は実行結果の抜粋です。
下記記事にある通り、PILの場合とは若干結果が異なります。
img_predict.shape =  (400, 150, 150, 3)

・・・

predict=[1.], proba=[1.], class=[1],
predict=[1.], proba=[1.], class=[1],
predict=[1.], proba=[1.], class=[1],
predict=[1.], proba=[1.], class=[1],
predict=[0.04205555], proba=[0.04205555], class=[0],
predict=[1.], proba=[1.], class=[1],
predict=[1.], proba=[1.], class=[1],
predict=[1.], proba=[1.], class=[1],
predict=[1.], proba=[1.], class=[1],

・・・

predict=[1.], proba=[1.], class=[1],
predict=[1.], proba=[1.], class=[1],
predict=[1.], proba=[1.], class=[1],
predict=[0.99994695], proba=[0.99994695], class=[1],
predict=[1.], proba=[1.], class=[1],
predict=[1.], proba=[1.], class=[1],
predict=[1.], proba=[1.], class=[1],
予測関数の意味
Keras Documentationによれば以下の通りです。
- predict
- Generates output predictions for the input samples, processing the samples in a batched way.
(Google翻訳:入力サンプルの出力予測を生成し、サンプルをバッチ処理します。)
- Generates output predictions for the input samples, processing the samples in a batched way.
- predict_classes
- Generate class predictions for the input samples batch by batch.
(Google翻訳:入力サンプルのクラス予測をバッチごとに生成します。)
- Generate class predictions for the input samples batch by batch.
- predict_proba
- Generates class probability predictions for the input samples batch by batch.
(Google翻訳:入力サンプルのクラス確率予測をバッチごとに生成します。)
- Generates class probability predictions for the input samples batch by batch.
ざっくり言うと以下のような感じかと思います。
- predict
- 生の予測データ
- predict_classes
- クラスの予測(分類問題において、どのクラスに属するか)
- predict_proba
- クラス予測の確率
predict と predict_proba の違いがいまいちはっきりしないですね。
本記事で実行した予測結果では、predict と predict_proba は同一の値が出力されていたので。
Kerasの実装
Kerasの実装を確認してみます。
# models.py抜粋

  def predict(self, x, batch_size=32, verbose=0):
      """Generates output predictions for the input samples.

      The input samples are processed batch by batch.

      # Arguments
          x: the input data, as a Numpy array.
          batch_size: integer.
          verbose: verbosity mode, 0 or 1.

      # Returns
          A Numpy array of predictions.
      """
      if not self.built:
          self.build()
      return self.model.predict(x, batch_size=batch_size, verbose=verbose)


  def predict_proba(self, x, batch_size=32, verbose=0):
      """Generates class probability predictions for the input samples.

      The input samples are processed batch by batch.

      # Arguments
          x: input data, as a Numpy array or list of Numpy arrays
              (if the model has multiple inputs).
          batch_size: integer.
          verbose: verbosity mode, 0 or 1.

      # Returns
          A Numpy array of probability predictions.
      """
      preds = self.predict(x, batch_size, verbose)
      if preds.min() < 0. or preds.max() > 1.:
          warnings.warn('Network returning invalid probability values. '
                        'The last layer might not normalize predictions '
                        'into probabilities '
                        '(like softmax or sigmoid would).')
      return preds

  def predict_classes(self, x, batch_size=32, verbose=0):
      """Generate class predictions for the input samples.

      The input samples are processed batch by batch.

      # Arguments
          x: input data, as a Numpy array or list of Numpy arrays
              (if the model has multiple inputs).
          batch_size: integer.
          verbose: verbosity mode, 0 or 1.

      # Returns
          A numpy array of class predictions.
      """
      proba = self.predict(x, batch_size=batch_size, verbose=verbose)
      if proba.shape[-1] > 1:
          return proba.argmax(axis=-1)
      else:
          return (proba > 0.5).astype('int32')
どうやら、predict() と predict_proba() は同じ値を返すようです。
predict_classes()は、predict()の値が0.5より大きければ1を返し、0.5以下の場合0を返すようです。
参考としてサンプルプログラムを以下に示します。
サンプルプログラム
proba = np.asarray([0.51, 0.5])
result = (proba > 0.5).astype('int32')
print('result=', result)
実行結果
result= [1 0]
結論
Kerasにおける予測では、以下の関数を使用すればよいと思います。
- 分類問題のクラスを予測:predict_classes()
- 実際の出力/予測確率:predict()
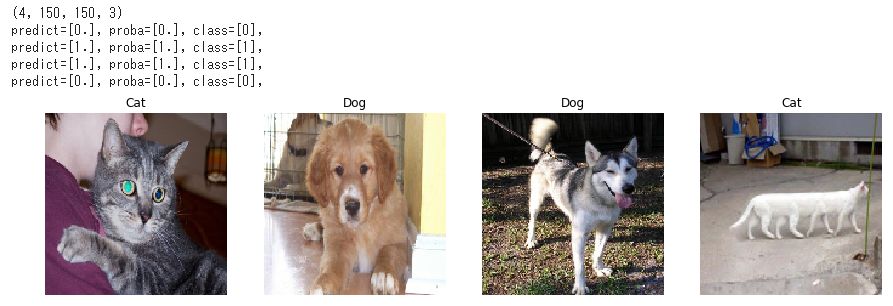
予測で入力画像と予測クラス(タイトル)を出力
どの入力画像に対して、どのようなクラスが予測されたのか分かりやすくしてみます。
以下のサンプルでは、未学習の入力画像に対する、予測クラスを画像タイトルとして出力しています。
ソース
from keras.models import load_model
from PIL import Image
import os
import numpy as np
import matplotlib.pyplot as plt


img_width, img_height = 150, 150
DATADIR = "/content/gdrive/My Drive/colab/sample"

model = load_model('model.h5')

img_predict = []

for image_name in os.listdir(DATADIR):
    try:
        img = Image.open(os.path.join(DATADIR, image_name))  # 画像読み込み
        img = img.convert("RGB")
        img = img.resize((img_width, img_height))  # 画像のリサイズ
        img_array = np.asarray(img)
        img_predict.append(img_array)
    except Exception as e:
        pass

img_predict = np.asarray(img_predict)
print(img_predict.shape)


result_predict = model.predict(img_predict)
result_predict_classes = model.predict_classes(img_predict)
result_predict_proba = model.predict_proba(img_predict)

fig = plt.figure(figsize=(15, 10))

for i in range(len(img_predict)):
    print("predict=%s, proba=%s, class=%s, " % (result_predict[i], result_predict_proba[i], result_predict_classes[i]))

    # 画像とラベルの表示
    plt.subplot(1, 4, i+1)
    plt.axis('off')
    plt.title(label = 'Dog' if result_predict_classes[i] == 1 else 'Cat')
    plt.imshow(img_predict[i], cmap='gray')

plt.show()
実行結果
以下は、全て正しい予測が出力された場合の結果です。
(入力画像が4つ)
参考
Keras Documentation:The Sequential model API
http://faroit.com/keras-docs/1.0.0/models/sequential/
Keras Documentation:ModelクラスAPI
https://keras.io/ja/models/model/
GitHub Gist:classifier_from_little_data_script_1.py
https://gist.github.com/fchollet/0830affa1f7f19fd47b06d4cf89ed44d
Qiita:[Keras/TensorFlow] KerasでMINSTの学習と予測
https://qiita.com/agumon/items/4c6ff24bfd77a5c8101d
How to Make Predictions with Long Short-Term Memory Models in Keras
How to Make Predictions with Long Short-Term Memory Models in Keras
非常に分かりやすい解説でした!Kerasでの重みの使い方が具体的に理解できました。サンプルコードも役立ちました。ありがとうございます!