JSONをHTMLの入力フォームでPOSTして受け取ったJSONをリダイレクトして画面上で表示する方法
JSONをHTMLの入力フォームでPOSTして受け取ったJSONをリダイレクトして画面上で表示する方法をご紹介します。
以下のような処理の流れです。
- JSONをHTMLの入力フォームでPOSTする。
- サーバー側モジュールでJSONを受け取ってセッションにセットする。
- リダイレクト後、受け取ったJSON情報を画面に表示する。
条件
- Spring Tool Suite 4
- Spring Boot 2.5.0
- jquery
プロジェクトの構成
ここでは、以下のような構成とします。

ソース
コントローラ
TestRestController.java
POSTされたJSON情報を受け取るメソッドを作成します。
受け取ったJSON情報をセッションにセットし、リダイレクト先URLをreturnします。
package com.example.controller;

import java.util.Iterator;
import javax.servlet.http.HttpServletRequest;
import javax.servlet.http.HttpSession;
import org.springframework.web.bind.annotation.PostMapping;
import org.springframework.web.bind.annotation.RestController;

@RestController
public class TestRestController {


    /**
     * POSTされたJSONの受け取り
     *
     * @param request
     * @param model
     * @return
     */
    @PostMapping("/output")
    public String showOutput(HttpServletRequest request) {

        Iterator<String> itr = request.getParameterMap().keySet().iterator();

        StringBuilder stbr = new StringBuilder();
        if (itr.hasNext()) {
            stbr.append(itr.next());
        }

        HttpSession session = request.getSession();
        session.setAttribute("strJson", stbr.toString()); // セッションにJSON情報をセット

        String strRedirectPath = request.getRequestURL().toString();

        return strRedirectPath.replace("/output", "/testoutput"); // リダイレクト先URL
    }
}
TestController.java
インプット画面表示用メソッド、アウトプット画面表示用メソッドを作成します。
returnで返す文字列が、表示する画面のhtmlファイル名に相当します。
アウトプット画面表示用メソッドでは以下の処理を行っています。
- セッションからJSON情報の文字列を取得する。
- 文字列をJSON形式にパースする。
- JSONの文字列情報を”json”というキーで、画面にパラメータとして渡す。(パースに失敗した場合はエラーメッセージを表示)
package com.example.controller;

import javax.servlet.http.HttpServletRequest;
import javax.servlet.http.HttpSession;
import org.springframework.stereotype.Controller;
import org.springframework.ui.Model;
import org.springframework.web.bind.annotation.GetMapping;
import com.fasterxml.jackson.core.JsonProcessingException;
import com.fasterxml.jackson.databind.JsonMappingException;
import com.fasterxml.jackson.databind.JsonNode;
import com.fasterxml.jackson.databind.ObjectMapper;

@Controller
public class TestController {


    /**
     * インプット画面
     *
     * @return
     */
    @GetMapping("/testinput")
    public String showInput() {

        return "testinput";
    }

    /**
     * アウトプット画面(Get)
     *
     * @param request
     * @param model
     * @return
     */
    @GetMapping("/testoutput")
    public String showOutputGet(HttpServletRequest request, Model model) {

        HttpSession session = request.getSession(false);
        String strJson = "";
        if (session != null) {
            strJson = (String) session.getAttribute("strJson"); // セッションからJSON情報を取得
            session.invalidate(); // セッション破棄
        }

        boolean isJson = true;
        ObjectMapper mapper = new ObjectMapper();
        try {
            JsonNode root = mapper.readTree(strJson);
            System.out.println(root.asText());
        } catch (JsonMappingException e) {
            isJson = false;
            e.printStackTrace();
        } catch (JsonProcessingException e) {
            isJson = false;
            e.printStackTrace();
        }

        if (isJson) {
            model.addAttribute("json", strJson);
        } else {
            model.addAttribute("json", "不正なJSONです。");
        }

        return "testoutput";
    }
}
画面
testinput.html
jqueryを用いて、textareaに入力された文字列をAjax通信でPOSTします。
成功した場合、レスポンスで取得したURLにリダイレクトします。
<!DOCTYPE html>
<html xmlns:th="http://www.thymeleaf.org">

<head>
  <script src="https://code.jquery.com/jquery-3.6.0.js"></script>
</head>

<body>


  <h4>JSONの送信</h4>
  <form name="form1" action="#" th:action="@{/showoutput}">

    <div>
      <label for="textarea1">JSON入力</label>
      <textarea id="textarea1" rows="30" cols="100" placeholder="JSONを入力してください。" name="inputdata"></textarea>
    </div>

    <input type="button" value="送信" onClick="clickPost();">

    <input type="reset" value="リセット" role="button" onClick="return clearFormAll()">

  </form>


  <script>
    function clickPost() {

      var url = location.href;  // 送信先URL
      var data = document.getElementById("textarea1").value; // POSTデータ

      $.ajax({
        url: url.replace('testinput', 'output'),
        //url: 'http://localhost:8080/testoutput',
        type: 'POST',
        //contentType: 'application/json',
        dateType:"json",
        timeout: 60000,
        data: data
      })
        //Ajax通信成功の場合
        .done(function (response, status, xhr) {
          //alert('success');
          console.log("status = " + status);
          console.log("xhr.status = " + xhr.status);
          window.location.href=response;
        })
        //Ajax通信失敗の場合
        .fail(function () {
          //alert('fail');
        })
        //Ajax通信の成功・失敗に関わらず最後に処理
        .always(function () {
          //alert('end');
        });
    }
  </script>

</body>

</html>
testoutput.html
jsonというキーで受けとった文字列を表示します。
<!DOCTYPE html>
<html xmlns:th="http://www.thymeleaf.org">

<head>

</head>

<body>

  <h4>受信したJSON</h4>
  <textarea id="textarea1" rows="30" cols="100" name="outputjson" th:text="${json}"></textarea>

</body>
  <br>
  <a href="javascript:history.back();">戻る</a>
</html>
実行例
以下のURLをブラウザで開きます。
http://localhost:8080/testinput
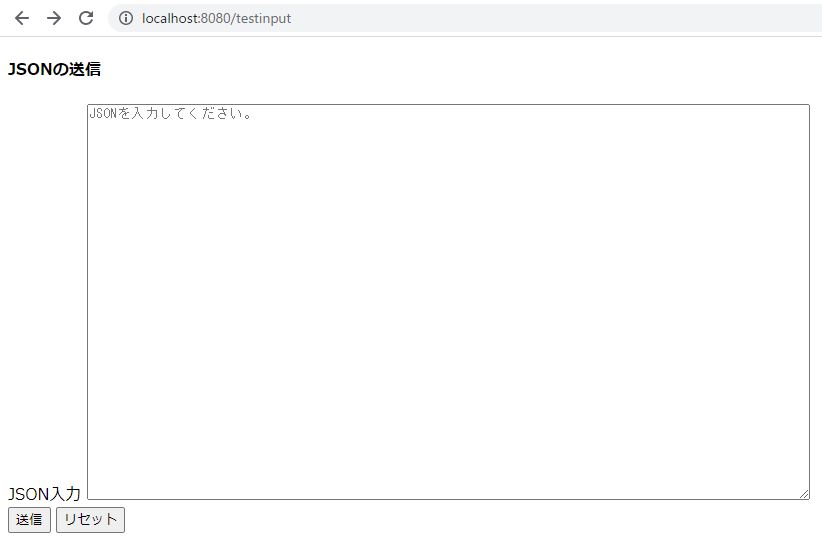
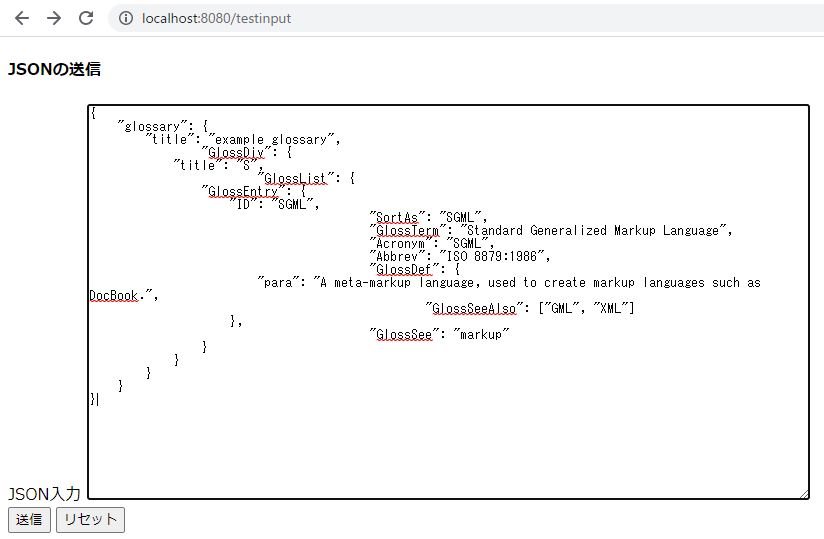
任意のJSONを入力して、送信ボタンを押します。
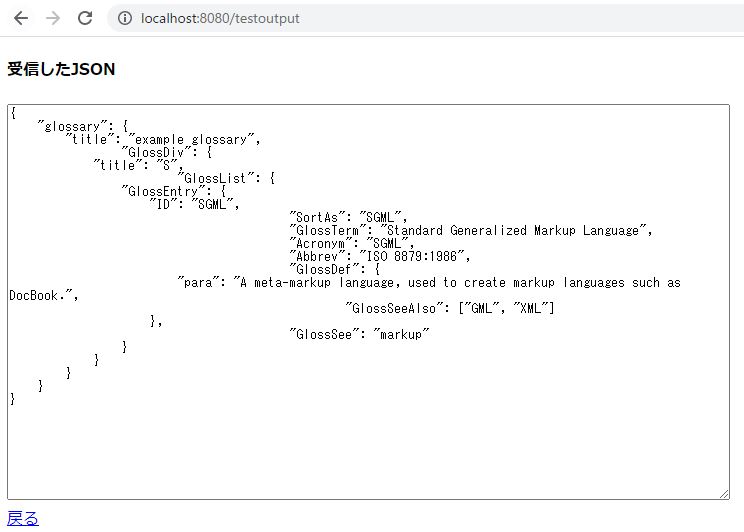
送信されたJSONが、アウトプット画面に表示されます。
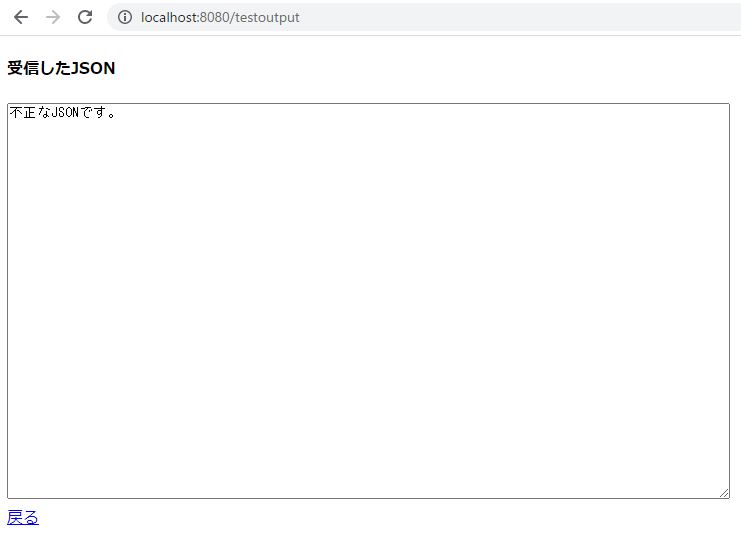
ちなみに、不正なJSONを送信すると以下のような表示になります。