バックエンド(SpringBoot)とフロントエンド(Nuxt.js)をローカルPC上で連携する方法
バックエンド(SpringBoot)とフロントエンド(Nuxt.js)をローカルPC上で連携する方法をご紹介します。
バックエンド(SpringBoot)をSpring Tool Suiteで動かし、Nuxt.jsをVisual Studio Codeで動かすものとします。
目次
条件
- Spring Boot(Spring Tool Suiteで動作)
- maven
- Nuxt.js(Visual Studio Codeで動作)
- JavaScript
- Yarn
バックエンドモジュールの作成
Spring Tool Suiteで適当なSpring Bootプロジェクトを作成します。
ここでは以下のようなプロジェクト構成としました。
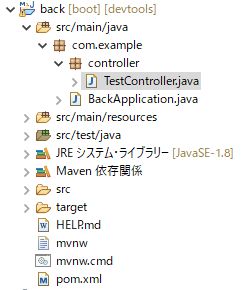
ソース等
TestController.java
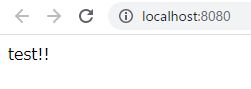
以下のURLにアクセスすると「test!!」と表示するだけの単純なコントローラを作成します。
http://localhost:8080/
package com.example.controller;

import javax.servlet.http.HttpServletRequest;
import org.springframework.web.bind.annotation.GetMapping;
import org.springframework.web.bind.annotation.RestController;

@RestController
public class TestController {

    @GetMapping(value = "/")
    public String getTest(HttpServletRequest request) {

        return "test!!";
    }
}
pom.xml
<?xml version="1.0" encoding="UTF-8"?>
<project xmlns="http://maven.apache.org/POM/4.0.0" xmlns:xsi="http://www.w3.org/2001/XMLSchema-instance"
  xsi:schemaLocation="http://maven.apache.org/POM/4.0.0 https://maven.apache.org/xsd/maven-4.0.0.xsd">
  <modelVersion>4.0.0</modelVersion>
  <parent>
    <groupId>org.springframework.boot</groupId>
    <artifactId>spring-boot-starter-parent</artifactId>
    <version>2.6.4</version>
    <relativePath/> <!-- lookup parent from repository -->
  </parent>
  <groupId>com.example</groupId>
  <artifactId>back</artifactId>
  <version>0.0.1-SNAPSHOT</version>
  <name>back</name>
  <description>Example Project</description>
  <properties>
    <java.version>1.8</java.version>
  </properties>
  <dependencies>
    <dependency>
      <groupId>org.springframework.boot</groupId>
      <artifactId>spring-boot-starter-web</artifactId>
    </dependency>

    <dependency>
      <groupId>org.springframework.boot</groupId>
      <artifactId>spring-boot-devtools</artifactId>
      <scope>runtime</scope>
      <optional>true</optional>
    </dependency>
    <dependency>
      <groupId>org.springframework.boot</groupId>
      <artifactId>spring-boot-starter-test</artifactId>
      <scope>test</scope>
    </dependency>
  </dependencies>

  <build>
    <plugins>
      <plugin>
        <groupId>org.springframework.boot</groupId>
        <artifactId>spring-boot-maven-plugin</artifactId>
      </plugin>
    </plugins>
  </build>

</project>
バックエンドの実行結果
以下のように表示されればOKです。
フロントエンドモジュールの作成
Nuxt.jsのインストール&プロジェクト作成
Visual Studio Codeでターミナルを開いて、以下のコマンドを実行します。
> npx create-nuxt-app
プロジェクト名の指定
プロジェクト名をきかれるので、適当な名前を入力します。
ここでは、nuxt-sampleとしました。
大文字は使用できないので注意が必要です。
言語の選択
JavaScriptまたはTypeScriptの選択肢が表示されます。
「JavaScript」を選択します。
パッケージマネージャーの選択
YarnまたはNpmの選択肢が表示されます。
「Yarn」を選択します。
UIフレームワークの選択
様々なUIフレームワークの選択肢が表示されます。
今回は何も使用しないため「None」を選択します。
モジュールの選択
以下、3つの選択肢が表示されます。
複数選択可能です。
- Axios
- Progressive Web App
- Content
今回はAxiosのみを選択しました。
Linting toolsの選択
複数の選択肢が表示されます。
複数選択可能です。
今回は何も選択せずに進みます。
テストフレームワークの選択
複数の選択肢が表示されます。
今回は何も使用しないため「None」を選択します。
レンダリング方法の選択
Universal (SSR / SSG)とSingle Page Appの選択肢が表示されます。
今回はUniversal (SSR / SSG)を選択しました。
developementターゲットの選択
Server (Node.js hosting)とStatic (Static/Jamstack hosting)の選択肢が表示されます。
今回はServer (Node.js hosting)を選択しました。
developementツールの選択
以下、3つの選択肢が表示されます。
複数選択可能です。
- jsconfig.json
- Semantic Pull Requests
- Dependabot
Visual Studio Codeを使用しているので推奨されるjsconfig.jsonを選択しました。
GitHubのユーザ名の入力
GitHubのユーザ名を入力します。
Version control systemの選択
今回はNoneを選択しました。
作成に成功すると以下のようなメッセージが表示されます。
Successfully created project nuxt-sample

  To get started:

        yarn dev

  To build & start for production:

        yarn build
        yarn start
実行
「yarn dev」コマンドを実行すると開始します。
以下のURLにアクセスするとデフォルト画面が表示されます。
http://localhost:3000/

バックエンドモジュールとの連携
axiosによるGet結果の表示
index.vueを以下のように変更します。
バックエンドモジュールに対してGetリクエストを投げて、結果を表示します。
<template>
  <span>{{ get_result }}</span>
</template>

<script>
export default {
  name: 'IndexPage',
  async asyncData({ $axios }) {
      const url = "http://localhost:8080/"; // 接続先URL
      const response = await $axios.$get(url); // GET
      return {
        get_result: response
      };
    }
}
</script>
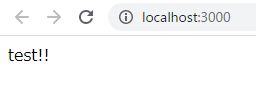
以下のような表示になればOKです。
バックエンドモジュールからデータを取得し、フロントエンド側に取得したデータを表示することが出来ました。
参考
【完全ガイド】ゼロからしっかり理解したい人向けのNuxt.js入門
https://reffect.co.jp/vue/nuxt-js-first-step#Nuxtjs